Israeli Couscous & Cheese – It Takes a Lot of Balls to Make this Recipe

I’ve always been fascinated with Israeli couscous, also known as pearl couscous, and have received several food wishes recently for a recipe showing it off. I’ve had it most often in cold salads, but for whatever reason I decided to turn it into a hot side dish.

Since it’s nothing more than tiny balls of lightly toasted pasta dough, I thought it would work well in some type of macaroni-n-cheese application. I decided to skip the traditional béchamel and instead use more of a risotto technique. Short story short, it worked great!

I’ve always been a fan of the southern delicacy “pimento cheese,” so I decided to hedge my bets and toss in some of the bittersweet jewels. All in all, I really liked the dish, and how well it held up. The shot you see at the end, when I dig the fork in for a taste, was actually filmed three days after this was made, and had been reheated in the microwave. Despite sitting in the fridge, and the less then gentle reheating, it was still creamy and delicious.

By the way, the chives may seem like a simple, optional garnish, but they’re not. Put them in. They really finished this recipe off right, adding a fresh counterpoint to the semi-rich mixture. I hope you give this “ballsy” recipe a try soon. Enjoy!


Ingredients for 4 small, side dish sized servings:
2 tsp melted butter
1 cup Israeli couscous
2 cups chicken broth
1/2 cup heavy cream
1/4 cup diced pimentos
3 oz sharp cheddar cheese
salt, pepper, cayenne to taste
1 tbsp freshly sliced chives

View the complete recipe

Israeli Couscous & Cheese – It Takes a Lot of Balls to Make this Recipe

I’ve always been fascinated with Israeli couscous, also known as pearl couscous, and have received several food wishes recently for a recipe showing it off. I’ve had it most often in cold salads, but for whatever reason I decided to turn it into a hot side dish.

Since it’s nothing more than tiny balls of lightly toasted pasta dough, I thought it would work well in some type of macaroni-n-cheese application. I decided to skip the traditional béchamel and instead use more of a risotto technique. Short story short, it worked great!

I’ve always been a fan of the southern delicacy “pimento cheese,” so I decided to hedge my bets and toss in some of the bittersweet jewels. All in all, I really liked the dish, and how well it held up. The shot you see at the end, when I dig the fork in for a taste, was actually filmed three days after this was made, and had been reheated in the microwave. Despite sitting in the fridge, and the less then gentle reheating, it was still creamy and delicious.

By the way, the chives may seem like a simple, optional garnish, but they’re not. Put them in. They really finished this recipe off right, adding a fresh counterpoint to the semi-rich mixture. I hope you give this “ballsy” recipe a try soon. Enjoy!


Ingredients for 4 small, side dish sized servings:
2 tsp melted butter
1 cup Israeli couscous
2 cups chicken broth
1/2 cup heavy cream
1/4 cup diced pimentos
3 oz sharp cheddar cheese
salt, pepper, cayenne to taste
1 tbsp freshly sliced chives

IFBC and Be Seen

Photo courtesy of Robin Ove, from
the blog, What About the Food
Michele and I just returned from a wonderful long weekend in Portland, where we attended the 2012 International Food Bloggers Conference. It was our first visit to “Stumptown,” and we thoroughly enjoyed our stay (although, I never did see even one stump).

People were very friendly, and the local food scene was as vibrant and interesting as I’d heard it would be, but the highlight was the photography workshop I got to participate in with my friend, and celebrated NY Times food photographer/writer, Andrew Scrivani.

Despite a few minor glitches, we somehow managed to fool the large audience into thinking we’d put on an informative and highly entertaining show. My theory is that they were so hung over from the night before that they weren’t fully aware what was going on, but nevertheless, the reviews on Twitter were embarrassingly positive.

In case you missed it, here’s a video that my friends at Jenn-Airshot, showing some highlights from the session. I’d like to thank them for sponsoring the event, along with Anolon, Wüsthof, OXO, and Ninja. Also, a huge thank you to Sheri, Barnaby, and the rest of the Foodista/Zephyr Adventures’ team for inviting me to participate, and for putting on such a fun event. See you next year in Seattle!

For additional coverage of the event, I invite you to check out Andrew’s IFBC post, as well as my new friend Paola Thomas’ entertaining recap here. Enjoy!


A Few Random Post-IFBC Thoughts:

Saying Goodbye to Social Media
It’s over. The social media bubble is just about to burst, and anyone who is unfortunate enough to be standing underneath it when it does is going to get soaked with scalding hot irony. That’s right, the very food bloggers whose unbridled enthusiasm for social self-promotion helped build this cheesy soufflé, are now tiring of the pungent scent, and openly rooting for its collapse. Shame on us. I’d do a Facebook poll to see what you think, but by the time I figure out how to set it up, the site will probably be down.

Instagram, FTW
One app immune to this social media fatigue is Instagram. It seems as though food bloggers love it just as much as the food in their pictures. It’s no wonder. Thanks to Instagram’s filters, those forgettable cell phone shots we used to post are now brilliant works of art…every one of them…brilliant. What used to be a blurry eggplant is now transformed into a scene so poignant, Joseph Pulitzer would weep. Now if you’ll excuse me, I’m going to set up a shot of my cat sipping on a cappuccino.

Portland Has Great Food
Michele and I had one great meal after another during our stay. We enjoyed the uniquely delicious cuisine of Le Pigeon, got our smoke on at Ox, and dined al fresco at Departure, where we experienced a view as spectacular as Chef Gregory Gourdet’s food. And, don’t even get me started on the amazing local beer and cocktails. I look forward to a return trip soon, so we can check out all the places we missed. Thanks again to everyone to chimed in with recommendations!

Salted Caramel Sauce – Take That, Hot Fudge!

It may be blasphemy to say that hot fudge isn’t the ultimate warm ice cream topping, but after tasting this amazing salted caramel sauce, that’s exactly what I’m suggesting. 

Hot fudge has a lot going for it – namely it’s hot and it’s fudge – but the way this complex, salty, slightly bittersweet caramel marries with the vanilla ice cream is a wonder to behold. Actually, I just had a thought…next time let’s use both!

The procedure couldn’t be easier, but you really should be sure to use a heavy-bottomed pot, and one that’s plenty big enough. As you’ll see, the sugar can really bubble up and over, and will make a sticky mess of biblical proportions.

Also, be extremely careful not to drip, spill, or splash any of the caramelized sugar on your skin. We’re talking instant 3rd degree burns. In fact, if you’re kind of clumsy, maybe it’s best not to take a chance, and just have the kids make it for you.

I know some of you will want an exact temperature for knowing when to turn off the heat and add the butter and cream, but I don’t have one. I’ve always gone by look and feel, and I’m not changing at this late age. Having said that, I'm sure there are a thousand links where you can get that kind of information.

Anyway, I really hope you put this on your culinary bucket list. Homemade salted caramel sauce is one of those things we all need to experience before heading to that big ice cream parlor in the sky. Enjoy!


Ingredients for about 1 1/4 cup Salted Caramel Sauce:
1 cup white sugar
5 tbsp butter, cut in slices
1/2 cup plus 1 tbsp heavy whipping cream (*Sorry, don’t ask me about substitutions. This needs cream!)
sea salt to taste (any salt works)

View the complete recipe

Salted Caramel Sauce – Take That, Hot Fudge!

It may be blasphemy to say that hot fudge isn’t the ultimate warm ice cream topping, but after tasting this amazing salted caramel sauce, that’s exactly what I’m suggesting. 

Hot fudge has a lot going for it – namely it’s hot and it’s fudge – but the way this complex, salty, slightly bittersweet caramel marries with the vanilla ice cream is a wonder to behold. Actually, I just had a thought…next time let’s use both!

The procedure couldn’t be easier, but you really should be sure to use a heavy-bottomed pot, and one that’s plenty big enough. As you’ll see, the sugar can really bubble up and over, and will make a sticky mess of biblical proportions.

Also, be extremely careful not to drip, spill, or splash any of the caramelized sugar on your skin. We’re talking instant 3rd degree burns. In fact, if you’re kind of clumsy, maybe it’s best not to take a chance, and just have the kids make it for you.

I know some of you will want an exact temperature for knowing when to turn off the heat and add the butter and cream, but I don’t have one. I’ve always gone by look and feel, and I’m not changing at this late age. Having said that, I'm sure there are a thousand links where you can get that kind of information.

Anyway, I really hope you put this on your culinary bucket list. Homemade salted caramel sauce is one of those things we all need to experience before heading to that big ice cream parlor in the sky. Enjoy!


Ingredients for about 1 1/4 cup Salted Caramel Sauce:
1 cup white sugar
5 tbsp butter, cut in slices
1/2 cup plus 1 tbsp heavy whipping cream (*Sorry, don’t ask me about substitutions. This needs cream!)
sea salt to taste (any salt works)

Hello from Delicious Portland

Just a quick note to let you know we're thoroughly enjoying our first visit to Portland. As we'd heard, they take their food (and apparently everything else) very seriously here. The photos below are from an amazing dinner we had at Le Pigeon (sorry, cell phone shots). By the way, the foie gras profiteroles (yes, you heard me) were topped with a perfectly made caramel sauce, which will be the new video recipe post on Monday. Stay tuned! 

Rabbit and Eel Terrine. Peaches, Avocado, Foie Gras Miso Vinaigrette.
Halibut, Uni, Grapes, Champagne Sauce.
Foie Gras Profiteroles, Caramel, Sea Salt.

Heading to Portland for IFBC!

Michele and I are on our way to Portland for the 2012 InternationalFood Blogger Conference. I’m going to be doing a cooking demo as part of a food photography workshop led by acclaimed New York Times' food photographer, Andrew Scrivani.

As usual, you can follow my exploits on Twitter, where I’ll be posting pictures of all the deliciousness we experience along the way. By the way, this is our first time to The City of Roses, so if you have any hot tips, let me know. Thanks!

The Truth Hurts
Speaking of food bloggers, this iPhone parody video by Adam Sacks is one of the funnier things I’ve seen in a while, and would probably have most IFBC attendees laughing and weeping at the same time. Enjoy!

Potato & Italian Frying Pepper Frittata and How I Learned to Swear in Italian

One of my earliest and fondest food memories is that of my grandfather making frittata. It wasn’t the taste of this hearty, Italian omelet that made such an impression, although that was always wonderful, it was the excitement surrounding “the flip.”

Traditionally, a frittata is cooked about three-quarters of the way, flipped over on to a plate, and slid back into the pan to finish cooking the other side. It’s an hot, slippery exercise fraught with danger, and more than one of his magnificent creations ended up a broken mess. Come to think of it, this is where I first learned how to curse in Italian.

The funny thing is, as long as you have a broiler to finish cooking the top, which he did, you don’t need to flip anything. Just pop it in for a few minutes to firm up the eggs, and brown the cheese, and you’re ready to eat. So, why did he insist on the always risky flip-n-slid?

I’m not exactly sure, but I imagine it was because his father flipped frittatas, and so did his grandfather. That’s just the way they were done, so that’s how he did it. Regardless whether you’re flipping or not, this rustic egg pie was invented for late summer’s vegetable bounty.

If you can fry it in olive oil, it tastes great in a frittata, especially leftover vegetables that would otherwise end up in the trash. It’s also amazing with any kind of summer squash. Just remember that the veggies need to be tender before the eggs go in, since they cook so fast. I hope you give this “memorable” recipe a try soon. Enjoy!


Ingredients for 4 servings:
12 large eggs
1 tbsp olive oil
6 slices of bacon or pancetta
1 1/2 cups sliced peppers
1 1/2 cups cubed, cooked potatoes
OR about 3 cups of any summer veggies
dry or fresh herbs to taste
salt and pepper to taste
hot pepper flakes to taste
2 oz crumbled feta cheese
*Remember to drain oil before adding potatoes and eggs!

We Came, We Saw, We Concassed

As promised, here’s the tomato concasse video I mentioned during the Steak Pizzaiola recipe. The technique is relatively quick and easy, and will allow you enjoy those gorgeous summer tomatoes sans skin and seeds. 

If you're feeling really ambitious, you could do a few quarts, and can them for the winter. Sure, those San Marzano tomatoes are fine, but there's nothing like putting up your own. Enjoy!

Hola Granola

I recently heard someone call San Francisco a “granola town.” Not sure what that means exactly, although I assume it has something to do with those damn hippies. Anyway, it reminded me that we did a granola video way back in 2009 (before we were famous), so some of you may not have seen it yet. 

Besides, there’s no better way to enjoy that sweet, juicy, late-summer fruit than with yogurt and crunchy, homemade granola. Click here to read the original post, and get the ingredient amounts. Enjoy!

Steak Pizzaiola – Better Late (Summer) Than Never

I’ve been wanting to post this steak pizzaiola recipe for a while now, but was bidding my time, waiting for those perfectly ripe late-summer tomatoes before trying it. 

Of course, those have been available around here for many weeks, but every time I’d buy some, I’d quickly use them on sandwiches, salads, etc., before getting to make this great dish. Hey, a BTL can be very seductive.

Well, I’m happy to announce I was finally able control my will power, and saved enough for a beautiful bowl of concasse, which is the soul of this superb sauce. Speaking of concasse – which is nothing more than a fancy French culinary term for peeled, seeded, and chopped tomatoes – I’ll be posting a video for how to do those on Tuesday, so stay tuned.

Like virtually every recipe we post, there are hundreds of ways to make pizzaiola; from versions featuring slowly braised tough cuts, like chuck or rump roast, to quickly seared tenderloin medallions, like I used here. The one thing most people agree on is that you should, if at all possible, use really fresh, very sweet, vine-ripened tomatoes.

Having said that, this would work with some finely chopped, canned San Marzano tomatoes in a pinch. I also encourage the use of both dried and fresh oregano, which I think work great together in this quick sauce. Anyway, I really hope you have access to some beautiful tomatoes, and that you give this steak pizzaiola recipe a try soon. Enjoy!


Ingredients:
1 pound beef tenderloin steaks, cut into 4 medallions
salt and pepper to taste
1 tbsp olive oil
1 cup mushrooms
2 tsp butter
1 cup sliced or diced sweet and/or hot peppers
4 cloves crushed garlic
1/2 cup white wine
1 cup finely chopped, peeled and seeded tomato (aka concasse)
pinch of hot chili flakes
1 tsp balsamic vinegar
1/4 tsp dried oregano
2 tbsp chopped fresh oregano
toasted bread and mozzarella, optional

View the complete recipe

Steak Pizzaiola – Better Late (Summer) Than Never

I’ve been wanting to post this steak pizzaiola recipe for a while now, but was bidding my time, waiting for those perfectly ripe late-summer tomatoes before trying it. 

Of course, those have been available around here for many weeks, but every time I’d buy some, I’d quickly use them on sandwiches, salads, etc., before getting to make this great dish. Hey, a BTL can be very seductive.

Well, I’m happy to announce I was finally able control my will power, and saved enough for a beautiful bowl of concasse, which is the soul of this superb sauce. Speaking of concasse – which is nothing more than a fancy French culinary term for peeled, seeded, and chopped tomatoes – I’ll be posting a video for how to do those on Tuesday, so stay tuned.

Like virtually every recipe we post, there are hundreds of ways to make pizzaiola; from versions featuring slowly braised tough cuts, like chuck or rump roast, to quickly seared tenderloin medallions, like I used here. The one thing most people agree on is that you should, if at all possible, use really fresh, very sweet, vine-ripened tomatoes.

Having said that, this would work with some finely chopped, canned San Marzano tomatoes in a pinch. I also encourage the use of both dried and fresh oregano, which I think work great together in this quick sauce. Anyway, I really hope you have access to some beautiful tomatoes, and that you give this steak pizzaiola recipe a try soon. Enjoy!


Ingredients:
1 pound beef tenderloin steaks, cut into 4 medallions
salt and pepper to taste
1 tbsp olive oil
1 cup mushrooms
2 tsp butter
1 cup sliced or diced sweet and/or hot peppers
4 cloves crushed garlic
1/2 cup white wine
1 cup finely chopped, peeled and seeded tomato (aka concasse)
pinch of hot chili flakes
1 tsp balsamic vinegar
1/4 tsp dried oregano
2 tbsp chopped fresh oregano
toasted bread and mozzarella, optional

Happy Birthday Julia!

Today would have been Julia Child's 100th birthday. As I recounted in the post "A Chicken for Julia," she was a great influence on me and my career, so if you haven't read the post or seen the delicious roast chicken recipe I dedicated to her, you can do so here. Enjoy!

Happy Birthday Julia!

Today would have been Julia Child's 100th birthday. As I recounted in the post "A Chicken for Julia," she was a great influence on me and my career, so if you haven't read the post or seen the delicious roast chicken recipe I dedicated to her, you can do so here. Enjoy!

Perfectly Puffy Popovers – What Do These Have in Common with Most Chefs?

They’re crusty outside and full of hot air inside. After posting that picture of the perfect popover I had in Chicago, a reader by the name of Elizzaruth left a comment to share her recipe, which she described as “stupid easy and adaptable.” She had me at stupid.

Since it'd been like 15 years since I’d made them, I figured I give her formula a try, and then adapt it as needed. Turns out it didn’t need any adapting. It worked as advertised, and really was ridiculously simple.

I imagine the only major variable would be your oven. If it doesn’t have an accurate thermostat, or takes an extra long time to come up to temperature, then you could have issues, but other than that, not much can go wrong.

One important note: As soon as this went live on YouTube, the Brits were out in force, insisting it was nothing more than a renamed Yorkshire pudding. Well, far be it from me to educate them on their own cuisine, but unless it's cooked in greasy meat drippings, it's not Yorkshire pudding! It's okay. They get confused with recipes that aren't boiled.

I'd like to officially thank to Elizzaruth for her great recipe, and I hope the next time you want something visually impressive in your breadbasket, you give these easy popovers a try. Enjoy!


Ingredients for 8-10 Popovers:
1 cup all-purpose flour
1/2 tsp salt
2 large eggs
1 cup milk
pinch cayenne
2 tbsp shredded cheddar cheese, optional
*Fill generously greased muffin tins 3/4 with batter. Put in a cold oven, set to 450 and bake 30 minutes exactly.

View the complete recipe

Perfectly Puffy Popovers – What Do These Have in Common with Most Chefs?

They’re crusty outside and full of hot air inside. After posting that picture of the perfect popover I had in Chicago, a reader by the name of Elizzaruth left a comment to share her recipe, which she described as “stupid easy and adaptable.” She had me at stupid.

Since it'd been like 15 years since I’d made them, I figured I give her formula a try, and then adapt it as needed. Turns out it didn’t need any adapting. It worked as advertised, and really was ridiculously simple.

I imagine the only major variable would be your oven. If it doesn’t have an accurate thermostat, or takes an extra long time to come up to temperature, then you could have issues, but other than that, not much can go wrong.

One important note: As soon as this went live on YouTube, the Brits were out in force, insisting it was nothing more than a renamed Yorkshire pudding. Well, far be it from me to educate them on their own cuisine, but unless it's cooked in greasy meat drippings, it's not Yorkshire pudding! It's okay. They get confused with recipes that aren't boiled.

I'd like to officially thank to Elizzaruth for her great recipe, and I hope the next time you want something visually impressive in your breadbasket, you give these easy popovers a try. Enjoy!


Ingredients for 8-10 Popovers:
1 cup all-purpose flour
1/2 tsp salt
2 large eggs
1 cup milk
pinch cayenne
2 tbsp shredded cheddar cheese, optional
*Fill generously greased muffin tins 3/4 with batter. Put in a cold oven, set to 450 and bake 30 minutes exactly.

Grilled Lemon & Rosemary Lamb Chops – Classic Inditalian

When it comes to grilling lamb loin chops, I usually go one of two ways. Usually, I take an Italian approach, and marinade the meat with lemon, garlic, and herbs. Or to change things up, sometimes I’ll go with more of an Indian style, and use a yogurt-based marinade along with the associated aromatic spices like cumin, cinnamon, and coriander.

I love both styles, but was having a hard time choosing which one to use this time. Eventually I gave up and decided to combine both into one uber-recipe. As the footage of me slicing through the pink, juicy meat hopefully illustrates, it worked wonderfully, and really did capture the magic of both methods.

By the way, be sure you’re buying “Loin Chops” and not “Rib Chops.” Loin chops look like thick, little t-bone steaks, while the rib chops have a single eye of meat and a long bone. The Loin chops are not only meatier, but work way better on the grill. They cost about the same, so be sure to ask the butcher.

Of course, some people don’t eat/like lamb (poor bastards), so feel free to use this “Inditalian” marinade on any other grillable meat. I’m going to try it on some half chickens next, and I’m predicting it’s going to rock. I hope you give this a try soon. Enjoy!


Ingredients:
8-10 lamb loin chops
1/2 cup plain yogurt
zest and juice from 1 large or 2 smaller lemons
1 rounded tablespoon ground hot chili sauce, like Sambal or Calabrian chilies
4 cloves garlic, crushed fine
1/4 teaspoon cinnamon
1 tsp dried oregano
2 tablespoons minced fresh rosemary
1 tsp salt
1/2 tsp freshly ground black pepper
*Marinate for 4 to 10 hours for best results
*Optional: season chops before grilling with salt and pepper to taste

Time Machine Chefs to Air Thursday, August 16th!

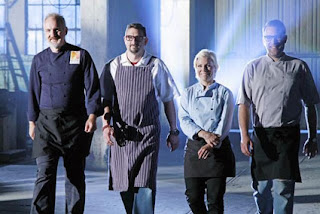
(Left to right): Art Smith, Chris Cosentino, Jill Davie,
Ilan Hall. Photo ABC
As some of you may remember, last year I flew to LA for a month to help produce a television pilot for a show called “Time Machine Chefs.”

Well, I’m thrilled to announce that it’s going to air Thursday night on ABC! I believe it’s on at 9 PM, but as they always say, check your local listings.

Below you’ll see a trailer to get a little taste of this very unique cooking competition. Basically, four star chefs head back in time and are expected to create world class cuisine using only food and equipment available then.

Come on, how are you not going to watch that? You’re going to watch, right? I promised them like half a million viewers, so it’s time to rally, people! Enjoy!